 or dragging
the existing boundaries. The part that is grayed-out or faded will not
be taken into account for conversion. Only the orange part within the
darker rectangle is converted into a 3D model.
or dragging
the existing boundaries. The part that is grayed-out or faded will not
be taken into account for conversion. Only the orange part within the
darker rectangle is converted into a 3D model.The second page of the wizard allows you to indicate the correct region of interest and the appropriate isovalue on three different 2D views (coronal, sagittal and axial). The colored lines indicate the cross-sections of the different reslices in the image.
The volume of interest (VOI) or region of interest is that particular part on the 2D view that is selected and considered to be converted into a 3D model. The isovalue defines the boundary of what will be converted into a 3D model.
The model is too noisy. What can I do to reduce artifacts?
To define which part of the scan images the system
has to take into account to convert into a 3D model, set the volume of
interest on the viewers. On either one of the viewers re-draw the region
by clicking Set
region  or dragging
the existing boundaries. The part that is grayed-out or faded will not
be taken into account for conversion. Only the orange part within the
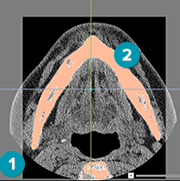
darker rectangle is converted into a 3D model.

1. The grayed-out part is excluded from the 3D model.
2. Only the orange part within the darker rectangle is converted.
1. Click Set Region  in
the sidebar.
2. Click and drag a rectangular area on the CT image (in either view). Notice that the other views change correspondingly.
3. The grayed-out part is excluded from the model.
1. Move the cursor to the edge of the region of interest.
2. The cursor turns into a double arrow.
3. Click and drag to set the appropriate region.
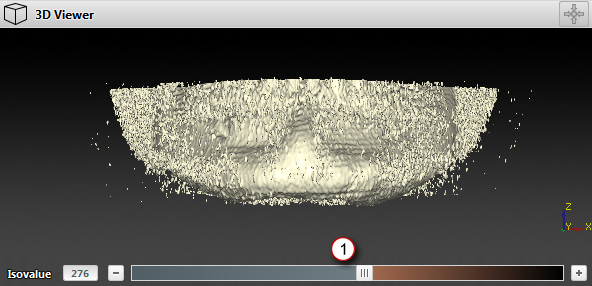
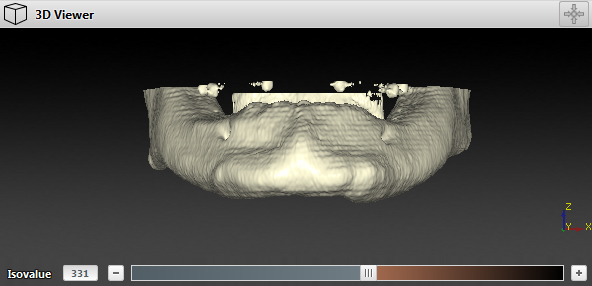
If the predefined lower threshold does not provide the level of detail desired, you must identify a threshold that is high enough to minimize the noise, but low enough to optimize the bone surface.

1. Isovalue slider
When a threshold of 270, for example, seems to be too low because too much noise appears, the threshold must be raised. At 900, the isovalue might seem to be too high because parts of the bone start disappearing and are not covered by the orange mask. A threshold of approximately 400 seems to be correct as there is only a limited amount of noise and all the bone surfaces are colored orange. Therefore, the appropriate threshold must be between 400 and 700.
Note
The numbers mentioned above are only an example. Each 3D model should be considered individually.
To modify the isovalue threshold:
— Drag the isovalue slider to the left or right to define the optimal isovalue.
— Enter the value in the isovalue input box.

If everything else fails to resolve the noise-problem, try smoothing the image. The amount of Gaussian smoothing is defined by a radius. If a lot of noise is present, increase the radius to obtain a smoother 3D model.
1. Go to the Set volume of interest and the isovalue page.
2. Click Settings.
3. Select the Smooth 3D model box in the Settings dialog.
4. Increase the value in the Radius box.
5. Click OK.
6. The new smoothing setting is applied to the patient model.
The 3D surface is defined by all points with a gray value equal to or higher than the indicated isovalue. On the 2D viewer all points that have a gray value equal to or higher than the indicated isovalue are colored orange. This is called a mask. All parts covered by the mask are converted into a surface.
Click Mask
 to hide the mask or
  to show it again
when it is hidden.
Select jaw type and set the occlusal plane