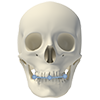
Create surgery models
The creation of surgery models is required to plan a 3D surgery. To add detailed dental information to the patient model, a scan of the dental cast according to a fixed scan protocol is required.
If the dental scan is available, follow the Surgery model wizard.
On the  Home tab, click Create surgery models
  .
.
Initially, no dental scan sets are loaded. Do one of the following, depending on the file format of the sets to be loaded:
Click  Import DICOM, browse to the correct location, select the folder that contains the files you need, and click Select Folder.
Click  Import STL, browse to select the folder containing the correct STL files obtained by a surface scanner, and click Open. The upper scan and the lower scan should be added separately. When the correct files are selected, click Import.
The dental scan files available at the selected location and / or the selected STL files are loaded. STL files are indicated with a Surface scan indication at the top of the tile. The patient name is shown on the tiles representing DICOM files.
To import additional dental scan sets, repeat steps 2 and 3.
Click a tile to select it. Now scroll through the files at the right of the wizard page to check whether the correct set is selected. When using STL files, inspect the scans using the standard interaction modes.
Note
If you choose a dental scan of a different patient, a warning icon is shown on the DICOM tile and a warning message is shown in the DICOM viewer, saying that there is a difference in the names of both DICOM sets.
Click Next.
The upper and lower jaw are shown in a separate viewer and in a different color. Check whether the upper and lower dental casts are correctly identified. If not, click the Switch casts icon . Ensure that the casts are rotated to the frontal view. Adjust with the Rotation slider at the bottom, if needed.
To adjust the dental scan isovalue of an imported DICOM set, click  Set isovalue in the lower-right corner. Enter the value to be used or drag the slider and click Done.
Click Next.
The position of different anatomical landmarks needs to be defined in order to create the occlusal plane. A wizard guides you through this process. Indicate the following landmarks:
the right mandibular condyle
a mesial cusp of the first upper right molar
the middle between the cusps of the upper central incisors
a mesial cusp of the first upper left molar
the left mandibular condyle
The condyles are visualized as boxes that can be dragged, and the other points as blue spheres.
Tip
Adjust the visualization of the patient model with the Bone Threshold action.
Check whether the occlusal plane is positioned correctly. Adjust the plane, if needed, by dragging the boxes around the condyles or the blue spheres. You can go Back in the wizard. To start all over, click Reindicate landmarks.
If the occlusal plane is positioned correctly, click Next.

The surgical models are created by aligning the dental casts and the patient model.
Note
If the alignment failed, an error message is shown. Click Adjust Alignment to manually adjust the initialization of the alignment calculation. If the alignment calculation of the other jaw also failed, you will be invited to indicate minimum three corresponding points for that jaw too.
Verify whether a separate cranium and mandible model are correctly created. The mandible will have a brown color, whereas the cranium will remain in white. Use the perpendicular view to scroll through the reslices and verify whether the dental scan is correctly aligned with the patient model. If you are not satisfied with the alignment of the dental casts and the patient model, click Adjust upper alignment or Adjust lower alignment.
Tip
Click Visibility  to show or hide the cranium, the dental reslice and/or the mandible. More information on the visibility of objects can be found here.
When two separate models are created and the dentitions are correctly aligned with the patient scan, click Finish. If no separate models have been created, try going through the wizard again and verify whether the condyle boxes were positioned correctly and whether the correct bone threshold value was set. If it still fails, please contact the help desk.
The dental cast is added to the model. By default, the dental casts are hidden as they are merged with the patient model to show a surgery model with detailed dental data.
To continue creating the patient model, go to the Load occlusion wizard for a physical occlusion workflow. For a digital occlusion workflow, add a virtual occlusion model.