Bone Cutting Plane
To indicate a plane representing the ideal bone level for the patient, use the Bone Cutting Plane action. Nothing will actually be removed. It is merely a visualization of where you plan to reduce the bone during surgery and a visual reference for planning your implant positions reflecting the new bone level. In DTX Studio™ Implant, the bone cutting plane indicates the final implemented result. Compensation for applied bone cutting instruments are handled in X-Guide™.
Click Bone Cutting Plane  in the Plan group on the Plan tab of the toolbar.
A purple plane is added to the patient model.
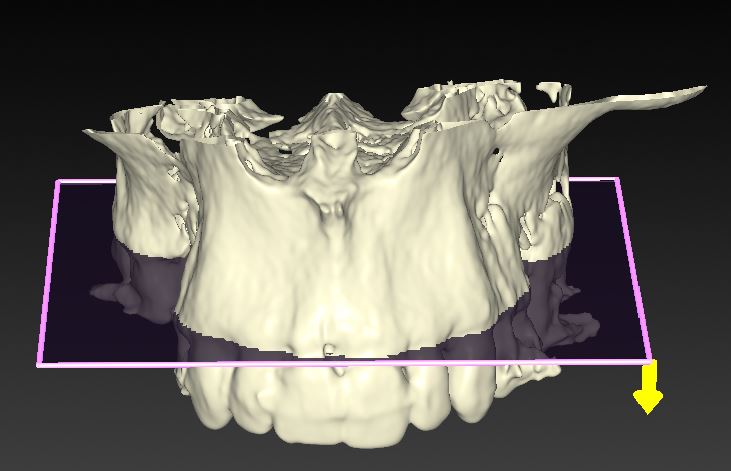
Click the plane to select it. Drag the colored handles at the boundaries to adjust the plane size and position. The opposite boundaries will stay parallel to each other when dragging.
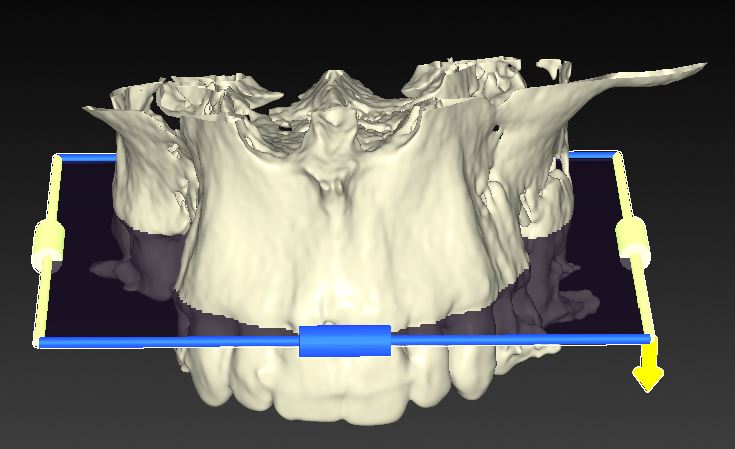
Use the Plane height slider in the right-click menu to adjust the position of the plane with respect to the Z-axis of the model.
Note
To change the plane's color or transparency, to hide the plane or delete it, use the corresponding options in the Bone Cutting Plane right-click menu. More information on this can be found in the Work with Planning Objects section.
Bone Cutting Plane Direction
The yellow arrow indicates the direction of the bone cutting.
Note:
The bone cutting plane direction will only matter when exporting an X-Guide™ surgical plan.
In communication with X-Guide™, an offset is applied to the bone cutting plane to take into account the size/thickness of the bone cutting instruments that will be used. The current implementation in X-Guide™ provides for a 2 mm diameter tool, resulting in an automated offset on their side of 1 mm. Bone removal is obviously performed in the direction towards the occlusal plane. For the lower jaw, for example, you would want to remove the bone above the inserted plane, for the upper jaw, below the plane. To take into account the thickness of the used instruments, the visualized plane in X-Guide™ (indicating the center of the to be navigated instrument) is therefore moved 1 mm upward in the lower jaw, and 1 mm downward in the upper jaw. This, so that the remaining bone after performing the cut will correspond with what has been planned for and indicated in DTX Studio™ Implant by means of the bone cutting plane.
To switch the bone cutting plane direction:
Right click the bone cutting plane.
From the right-click menu, choose Remove Bone.
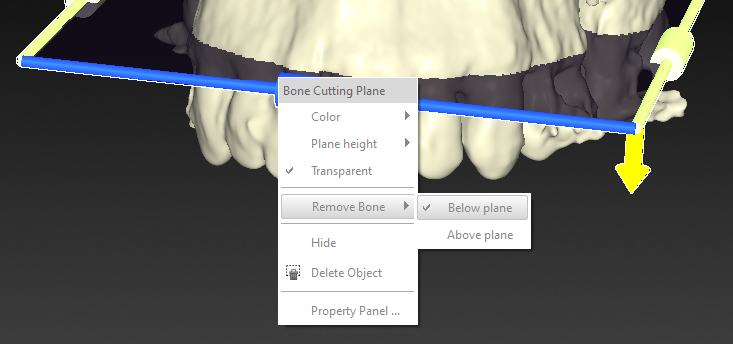
Now select either Above plane or Below plane.
Note
The plane in the software is the level you wish to keep. It is not necessarily X-Guide™'s bone trajectory plane.
Related information
Bone Cutting Plane Keyboard Shortcuts