Plateless model design
Set here the parameters for the physical model.
 |
|
 ditch ditch  shaft shaft pin pin  seating width seating width
|

For a restoration with dies, there will be a Dies tab to set the dies model parameters.
If Plateless model (cutout dies) was selected during model alignment, use the Masks tab settings to draw a gingiva mask around prepared dies.
If Plateless model (gingival masks flat) was selected during model alignment, use the Masks tab settings to add a gingiva mask. Click Add. The customizable matrix shape selection tool is shown. Move the control points and / or use the hotkeys [Ctrl] and [Shift] to modify the shape.
Green arrows in the CAD viewer allow you to change the insertion direction of the die. Click Set from view to give all the dies the same angulation as the one from the current view, so the dies will be easily removable.
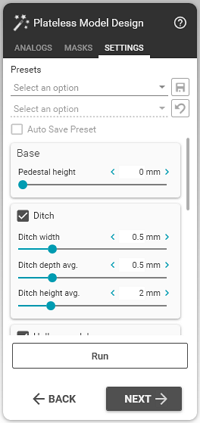
When the Settings tab is clicked, use the blue arrow on the CAD viewer to set the model base direction.
To select 3D printer presets, click the Settings tab. Choose a setting in Presets. Click  to save the current setup settings as personal printer presets. They will be available in future model designs.
Once the settings are valid, click Run.
Note
To save the scene, right-click and select Save scene as.
If there is an antagonist scan, do the same for the other jaw.